info@polydome.ie
 057 912 0424
 Polydome Ltd, Birr, County Offaly, R42 VX36
View Map
Polydome Ltd, Birr, County Offaly, R42 VX36
View Map


 info@polydome.ie
 057 912 0424
Construction
Polytunnels are relatively simple to build – the part that concerns people most is doing a good job of covering the Polytunnel – but this too is actually quite simple and we have videos and instructions available to explain it as well as a helpline available five days a week.
If you are or know of someone who enjoys building Polytunnels and wants to offer that service in your locality please let us know and we will look into having them on our list for customers to contact directly.
To help give you a sense of what is involved in building a Polytunnel we describe below the process. The most basic small Polytunnels can be built in one day, but most small ones take two days and would need two or three people building them. Most even large Polytunnels would be built within one week with three people. A major help will be to choose good weather, calm especially when covering, dry particularly when doing ground works and covering.
Building your Polytunnel involves several steps:
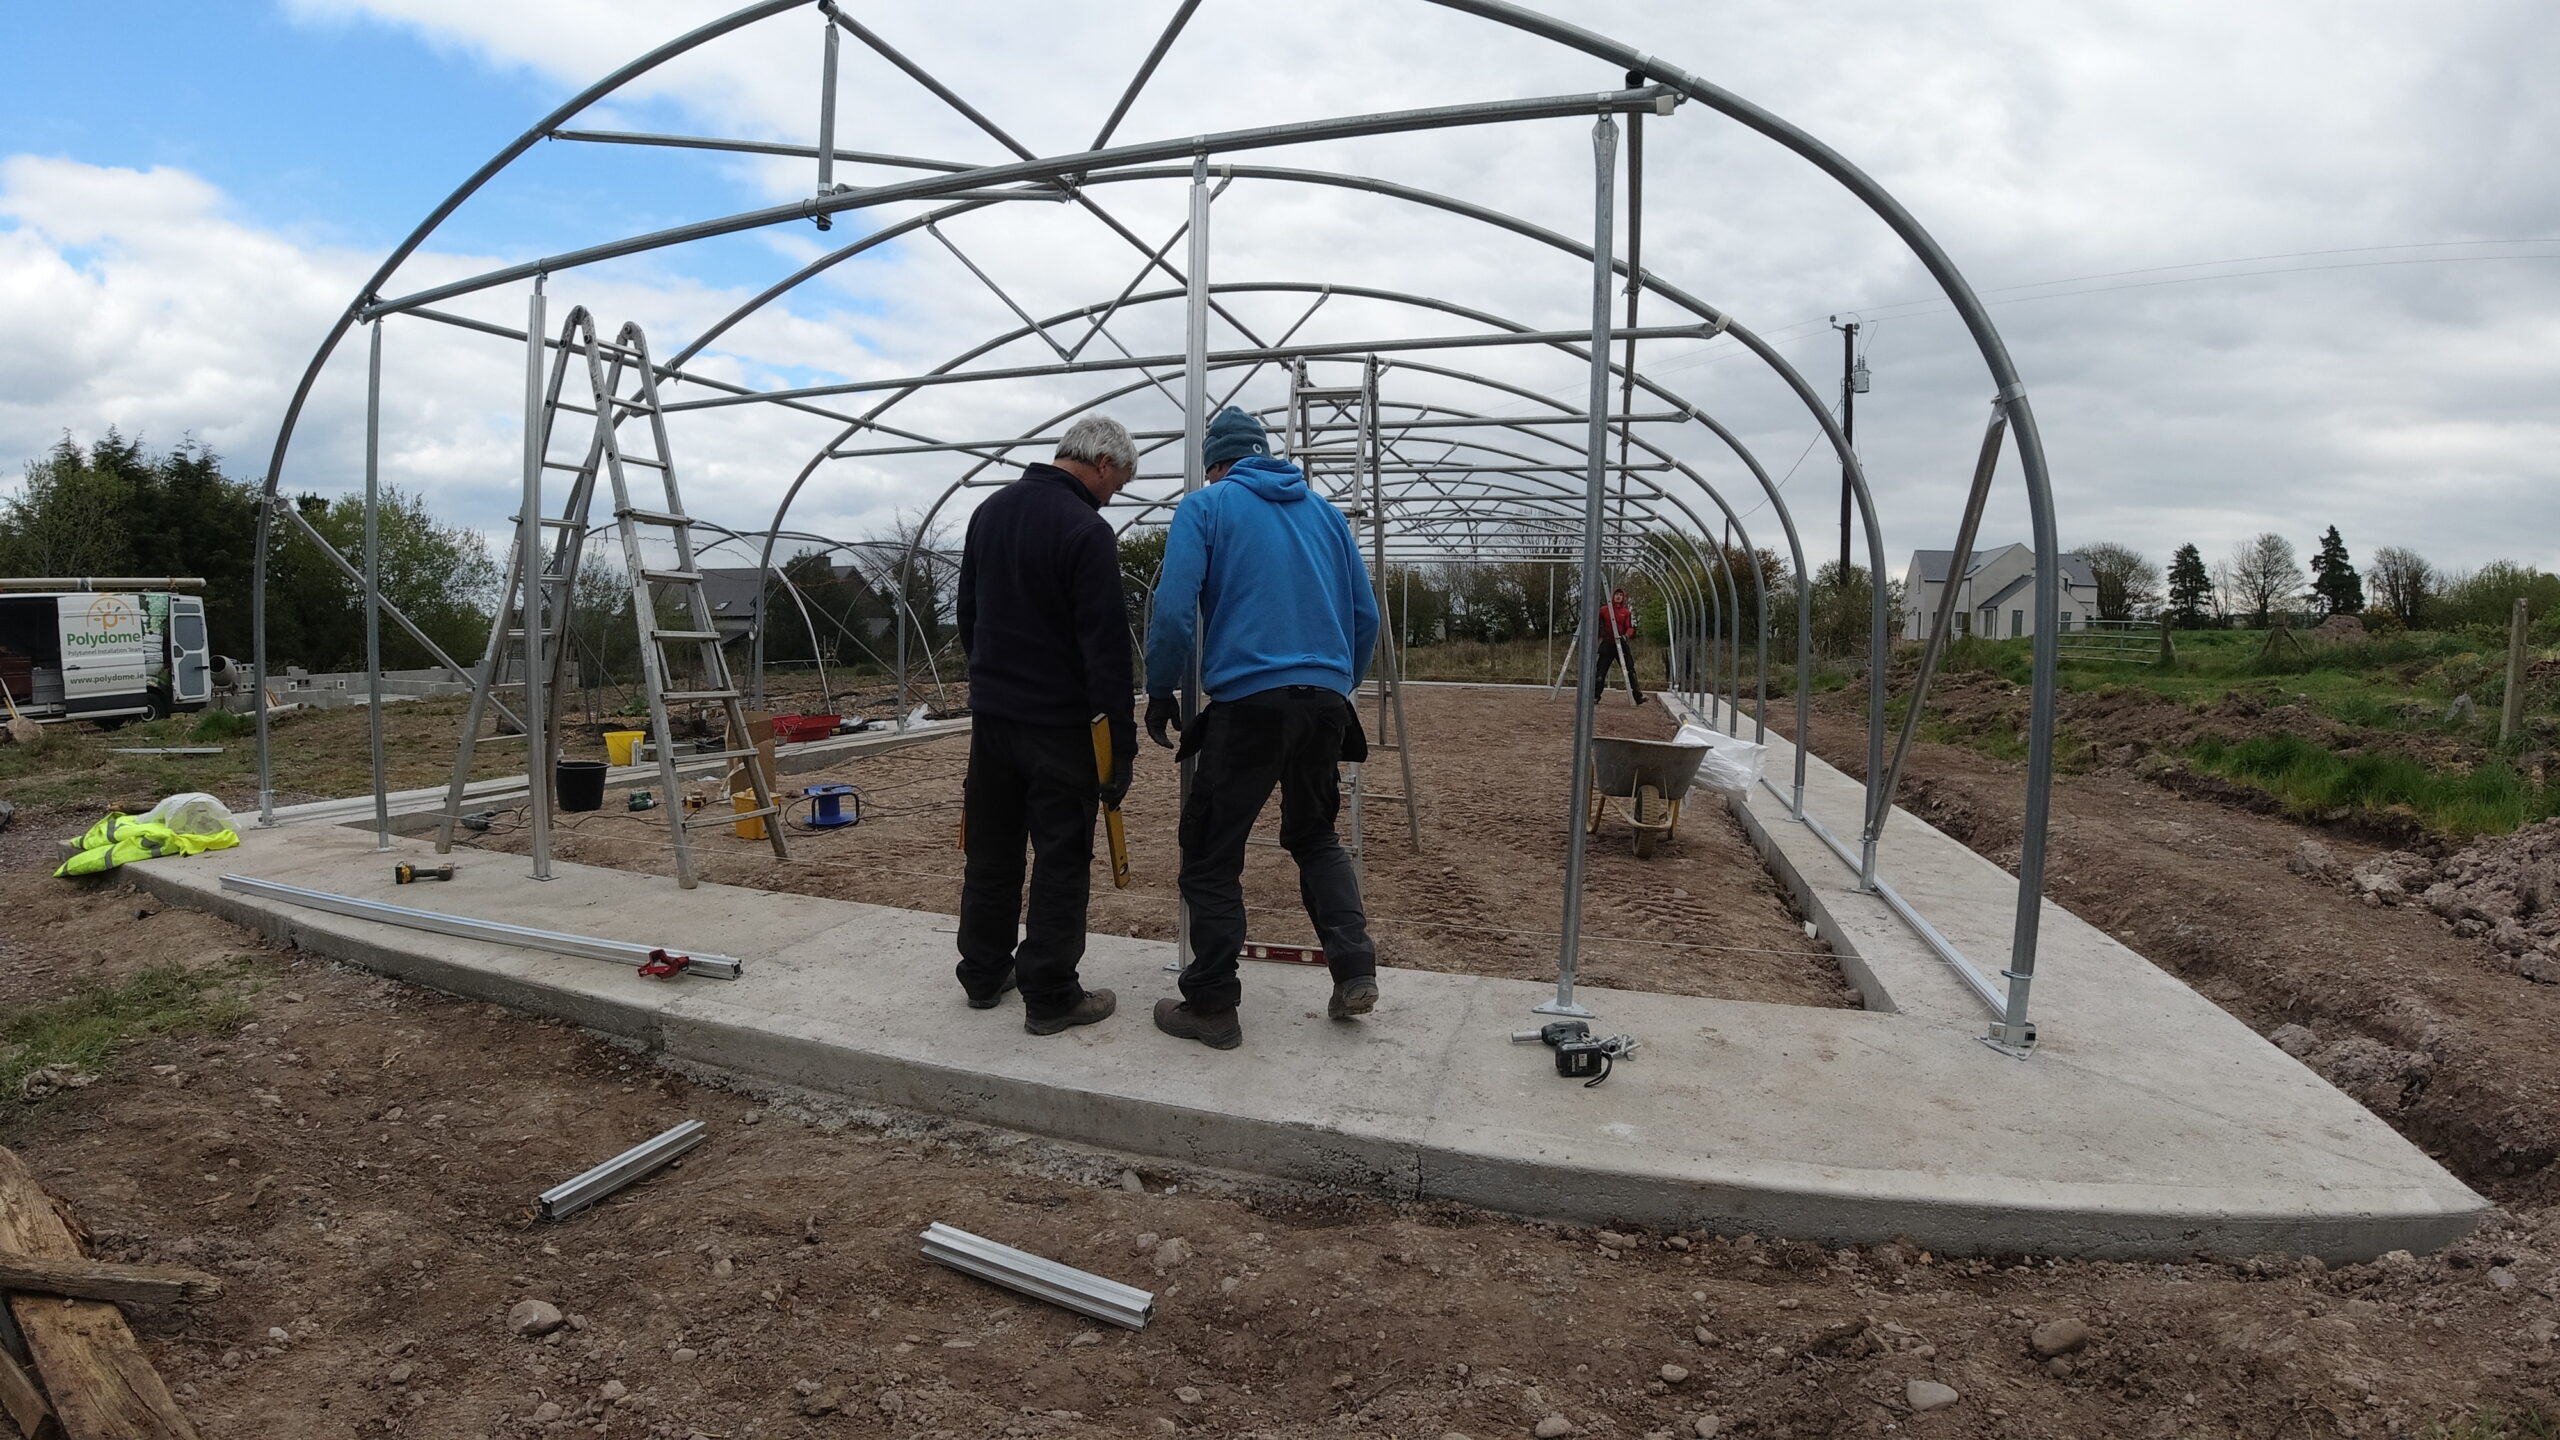
Foundation work
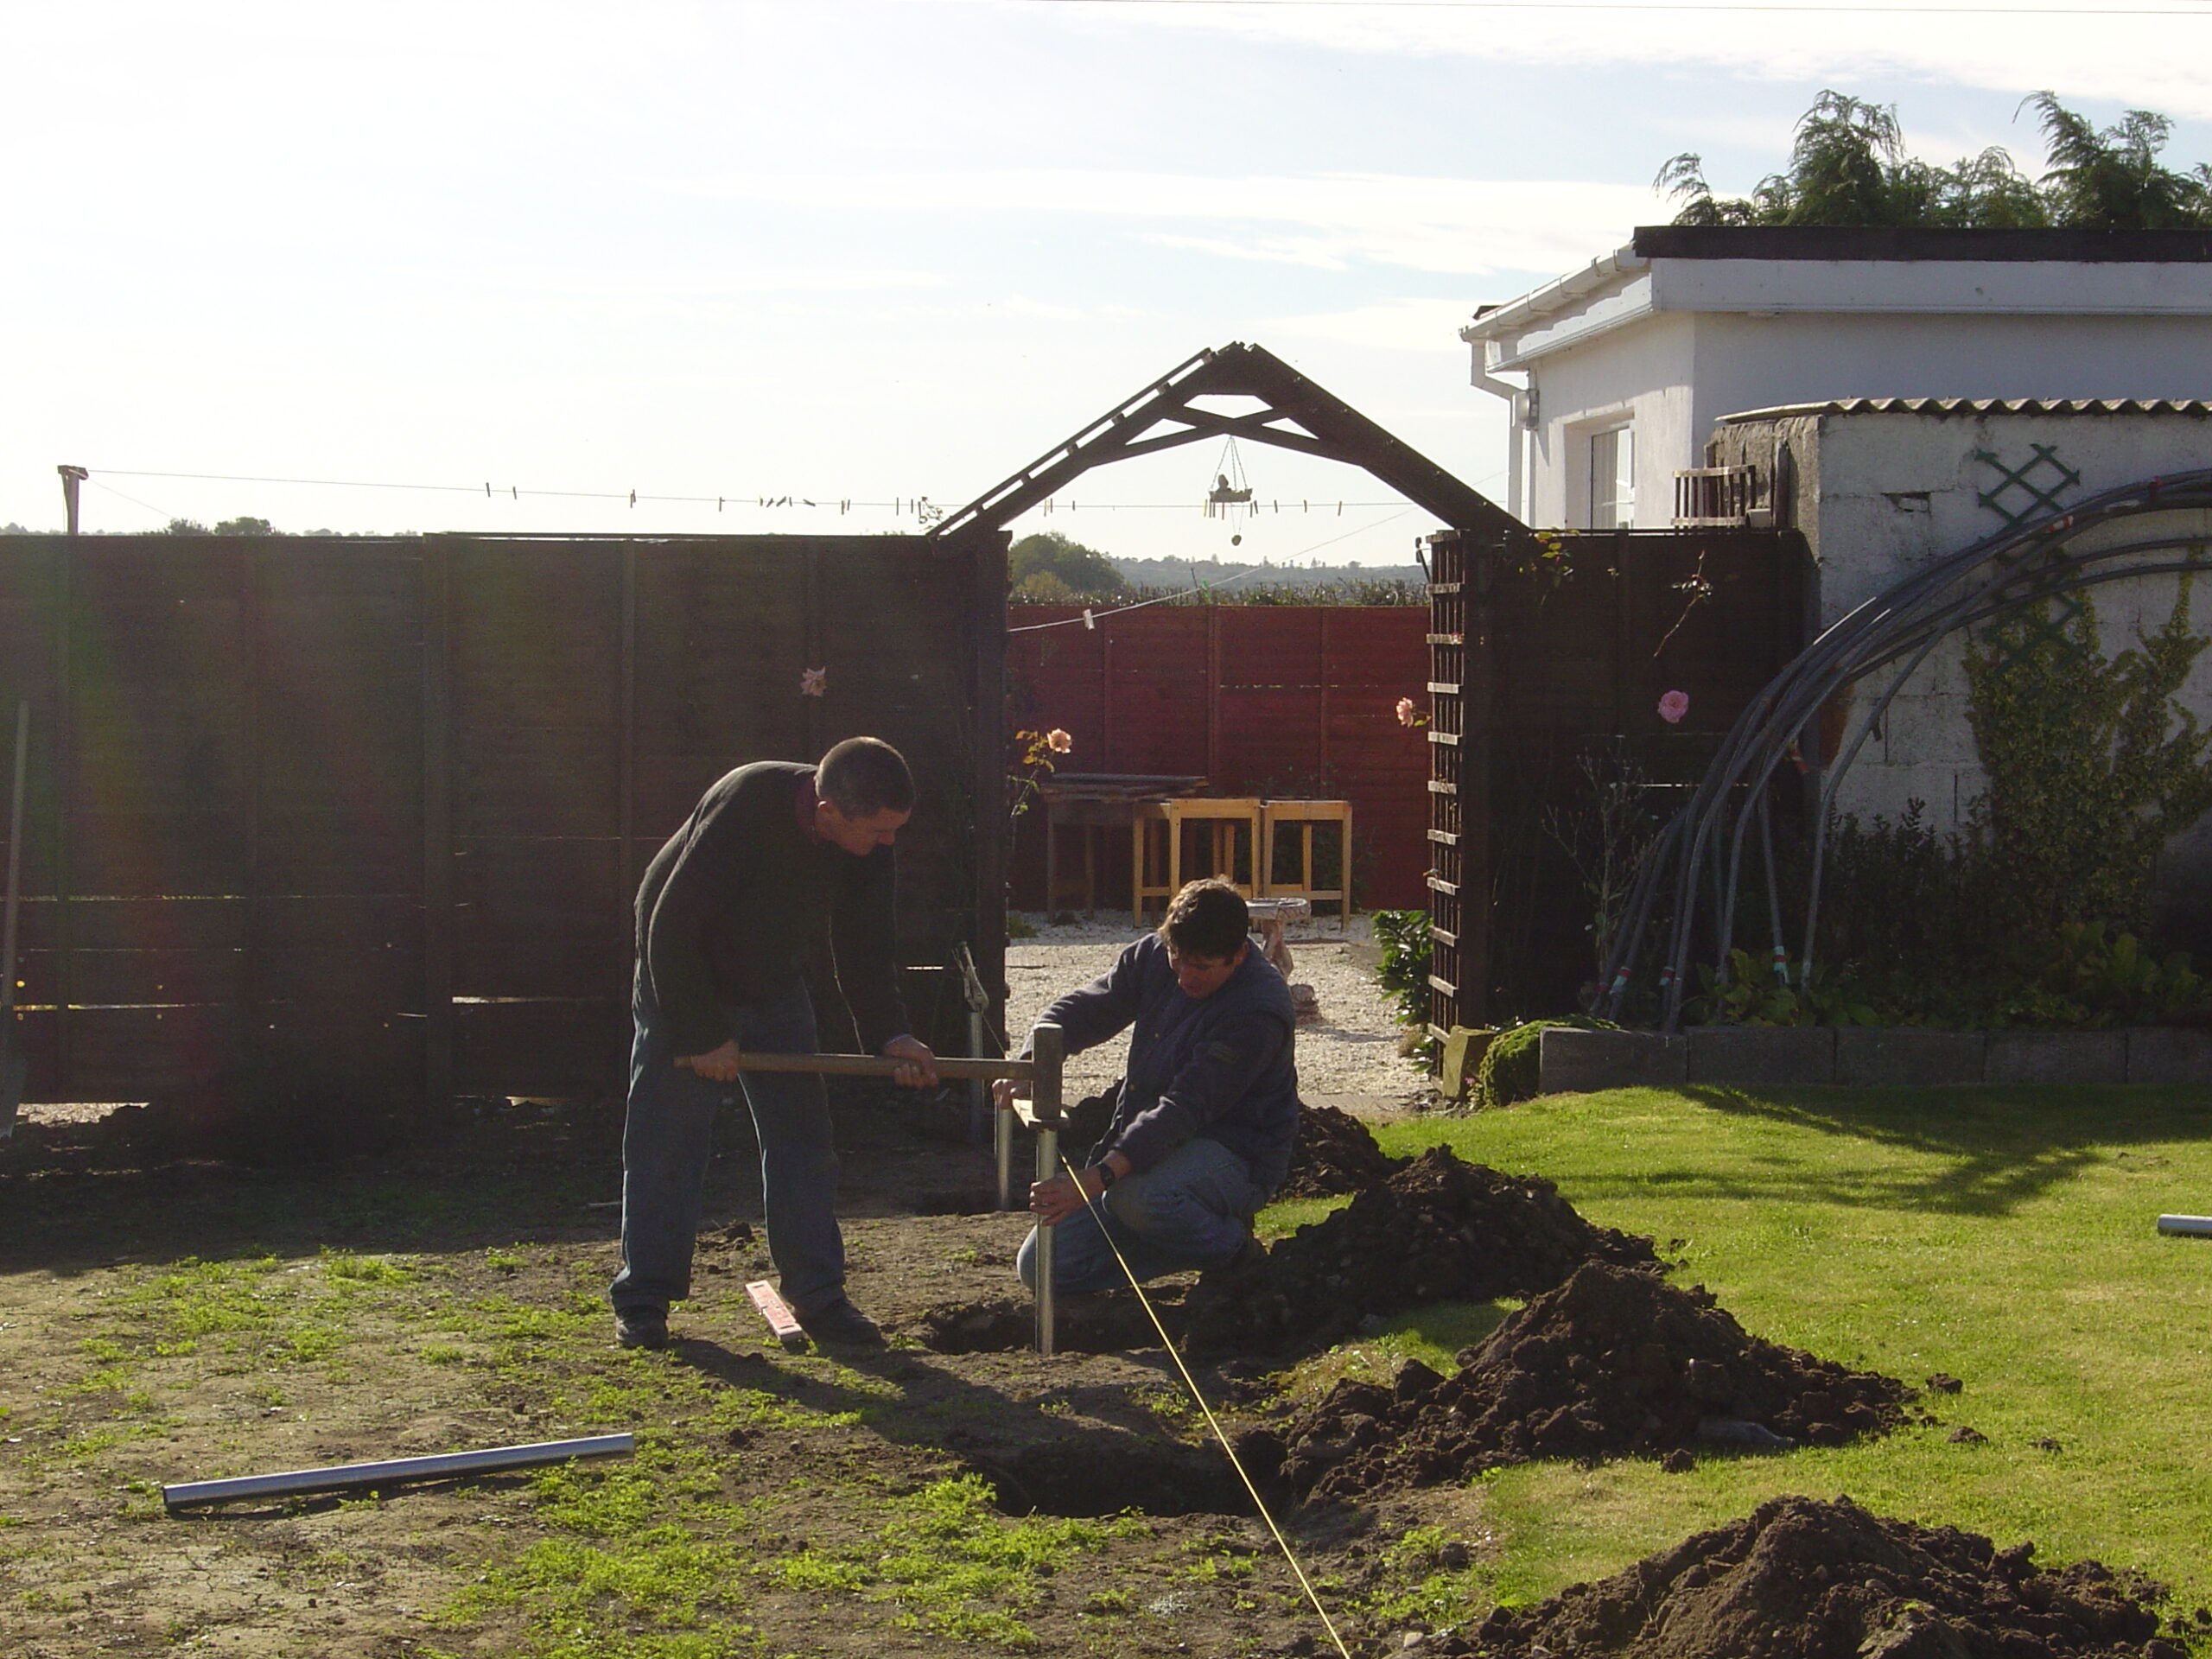
Foundation options (which depend on the size of Polytunnel and type of ground) include sledgehammering foundation tubes 600mm (2ft) into the ground, digging holes and concreting the foundation tubes, drilling and fixing ‘flat feet’ (foundation tube with a steel plate at the bottom of it) to concrete or tarmac, anchor plates which are stainless steel plates that are secured to the foundation tubes and buried under ground. In our pricing configurator information is given on these different types of foundation options available for each model – and our sales team will be happy to give advice.
Choosing a suitable site is important too, please refer to our Frequently Asked Questions (FAQ’s) to see more on that. But basically a Polytunnel will need to be level across it’s width (the narrow end) and you may have a slight slope along the length. So when doing foundations you will need to be able to measure levels – this might be with a laser level, or a simple small line level. You will obviously have to dig holes by hand or with a digger or auger, or will need to drill holes in concrete or tarmac.
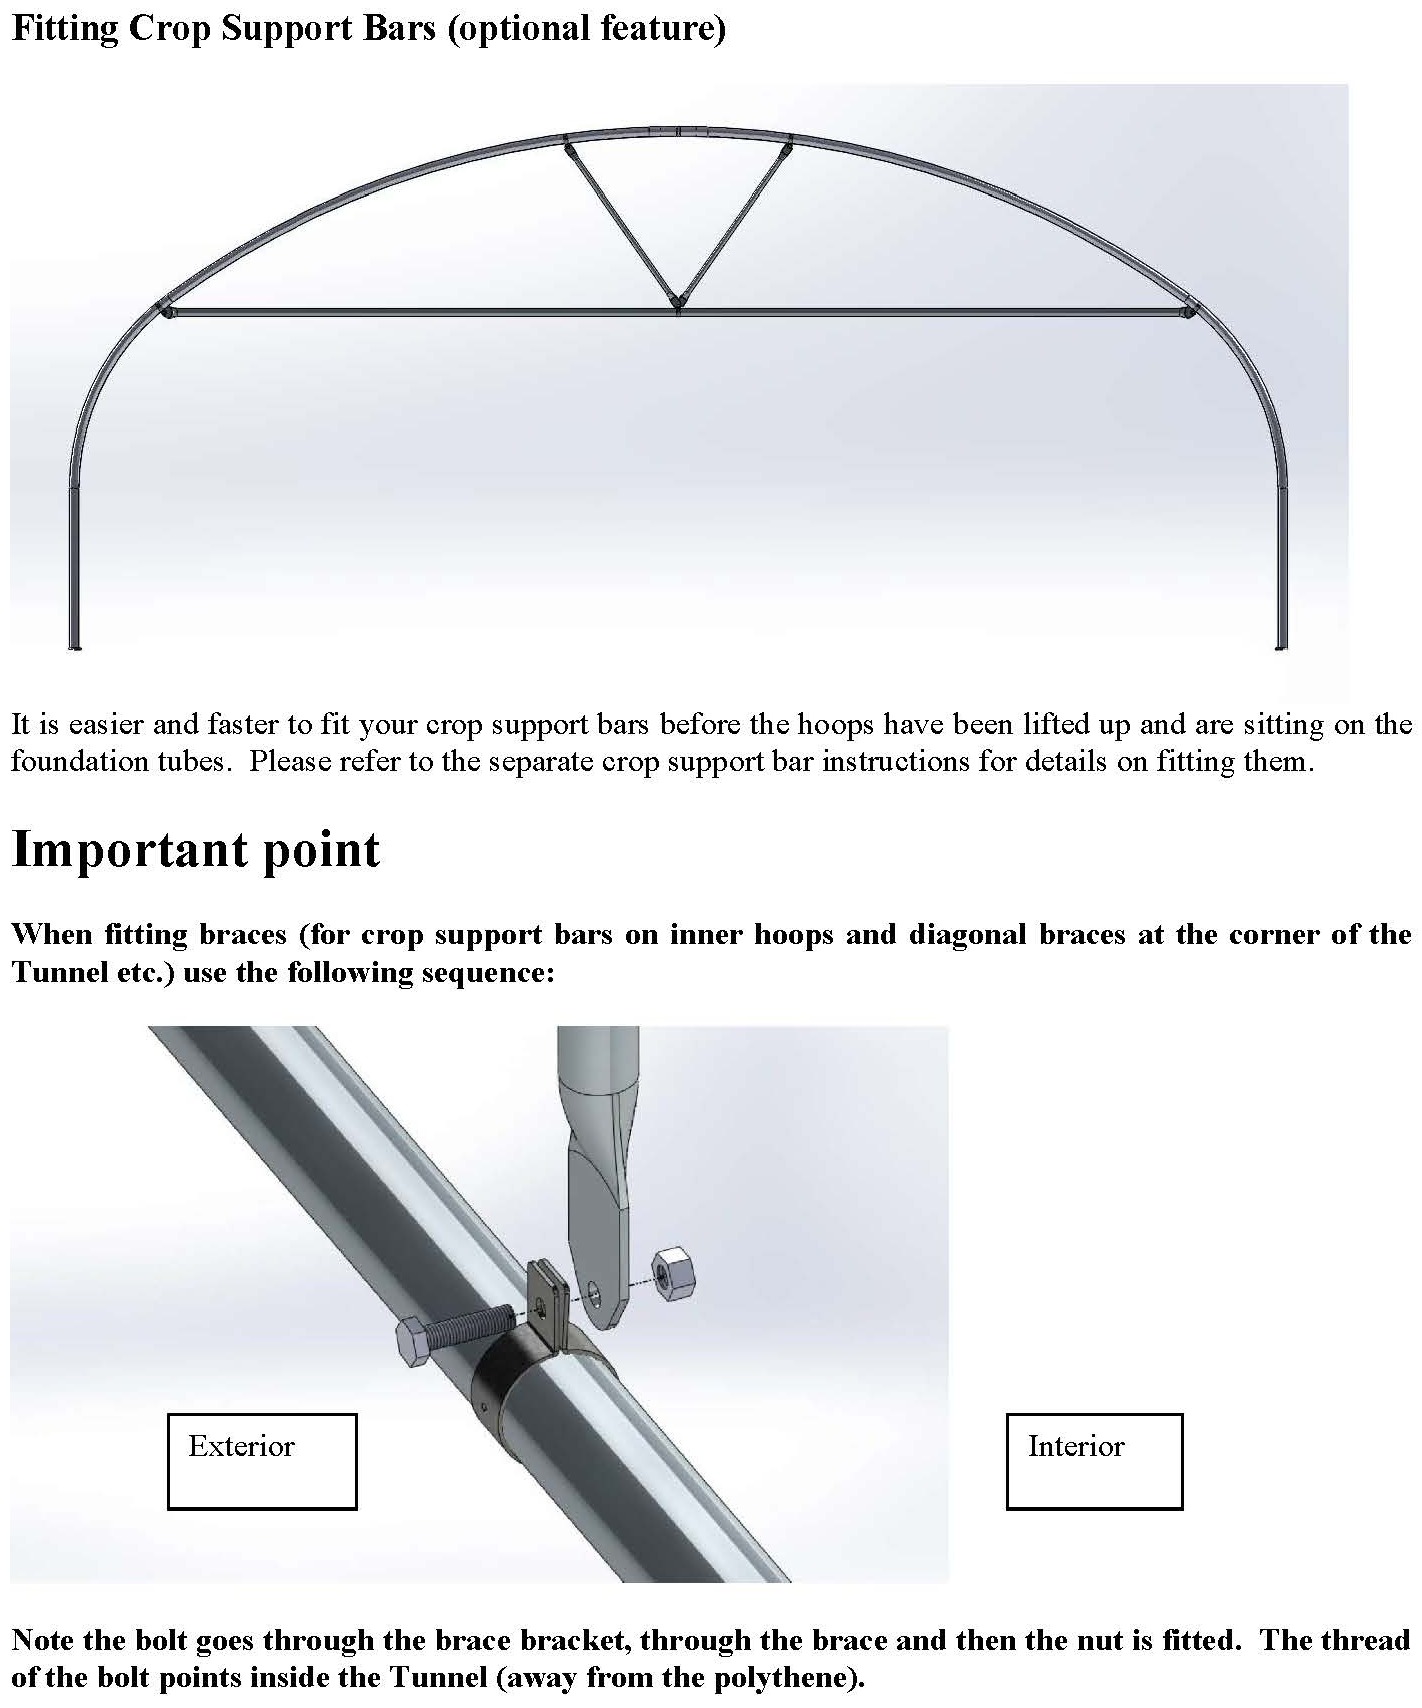
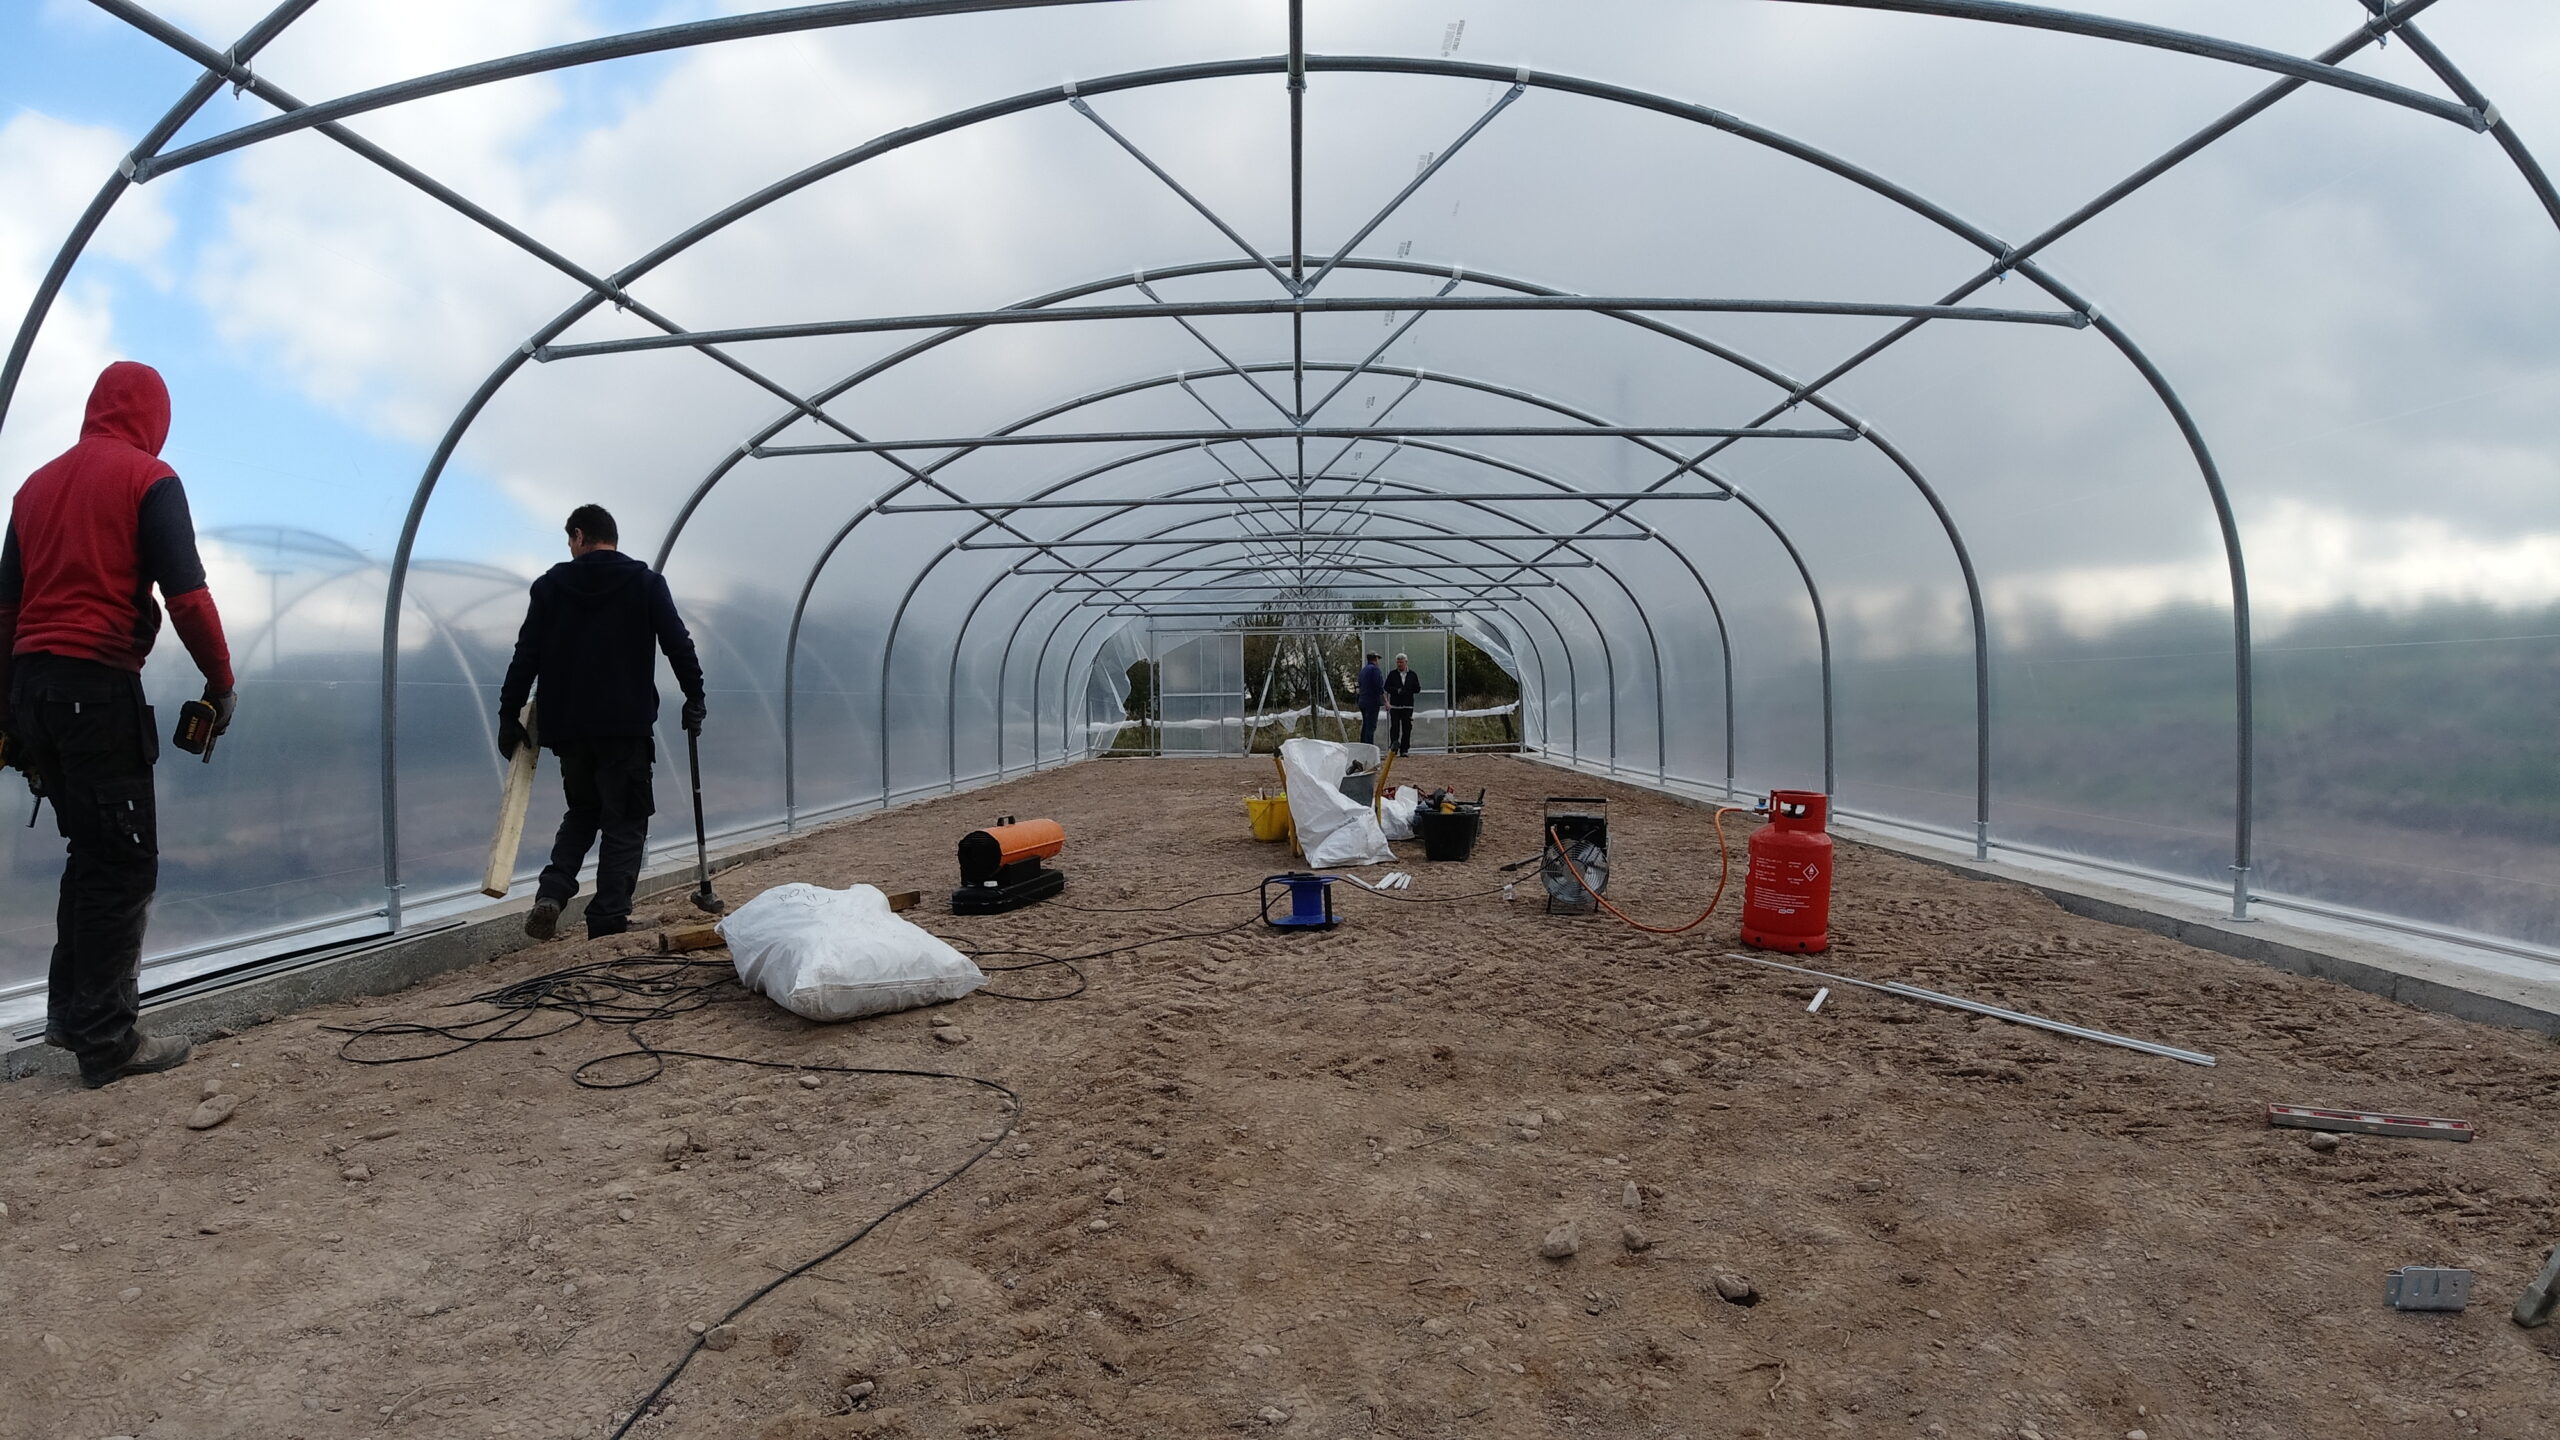
Building the frame
Assembling the frame is simple, it involves tightening some nuts and bolts and driving some self drilling teck screws. The typical socket/spanner sizes required are 13mm and 17mm. A cordless combi drill/screwdriver or similar will be needed to drive the teck screws. A spirit level will be need to make the frame ‘plum’. You will need safe access equipment such as sturdy A frame step ladders.
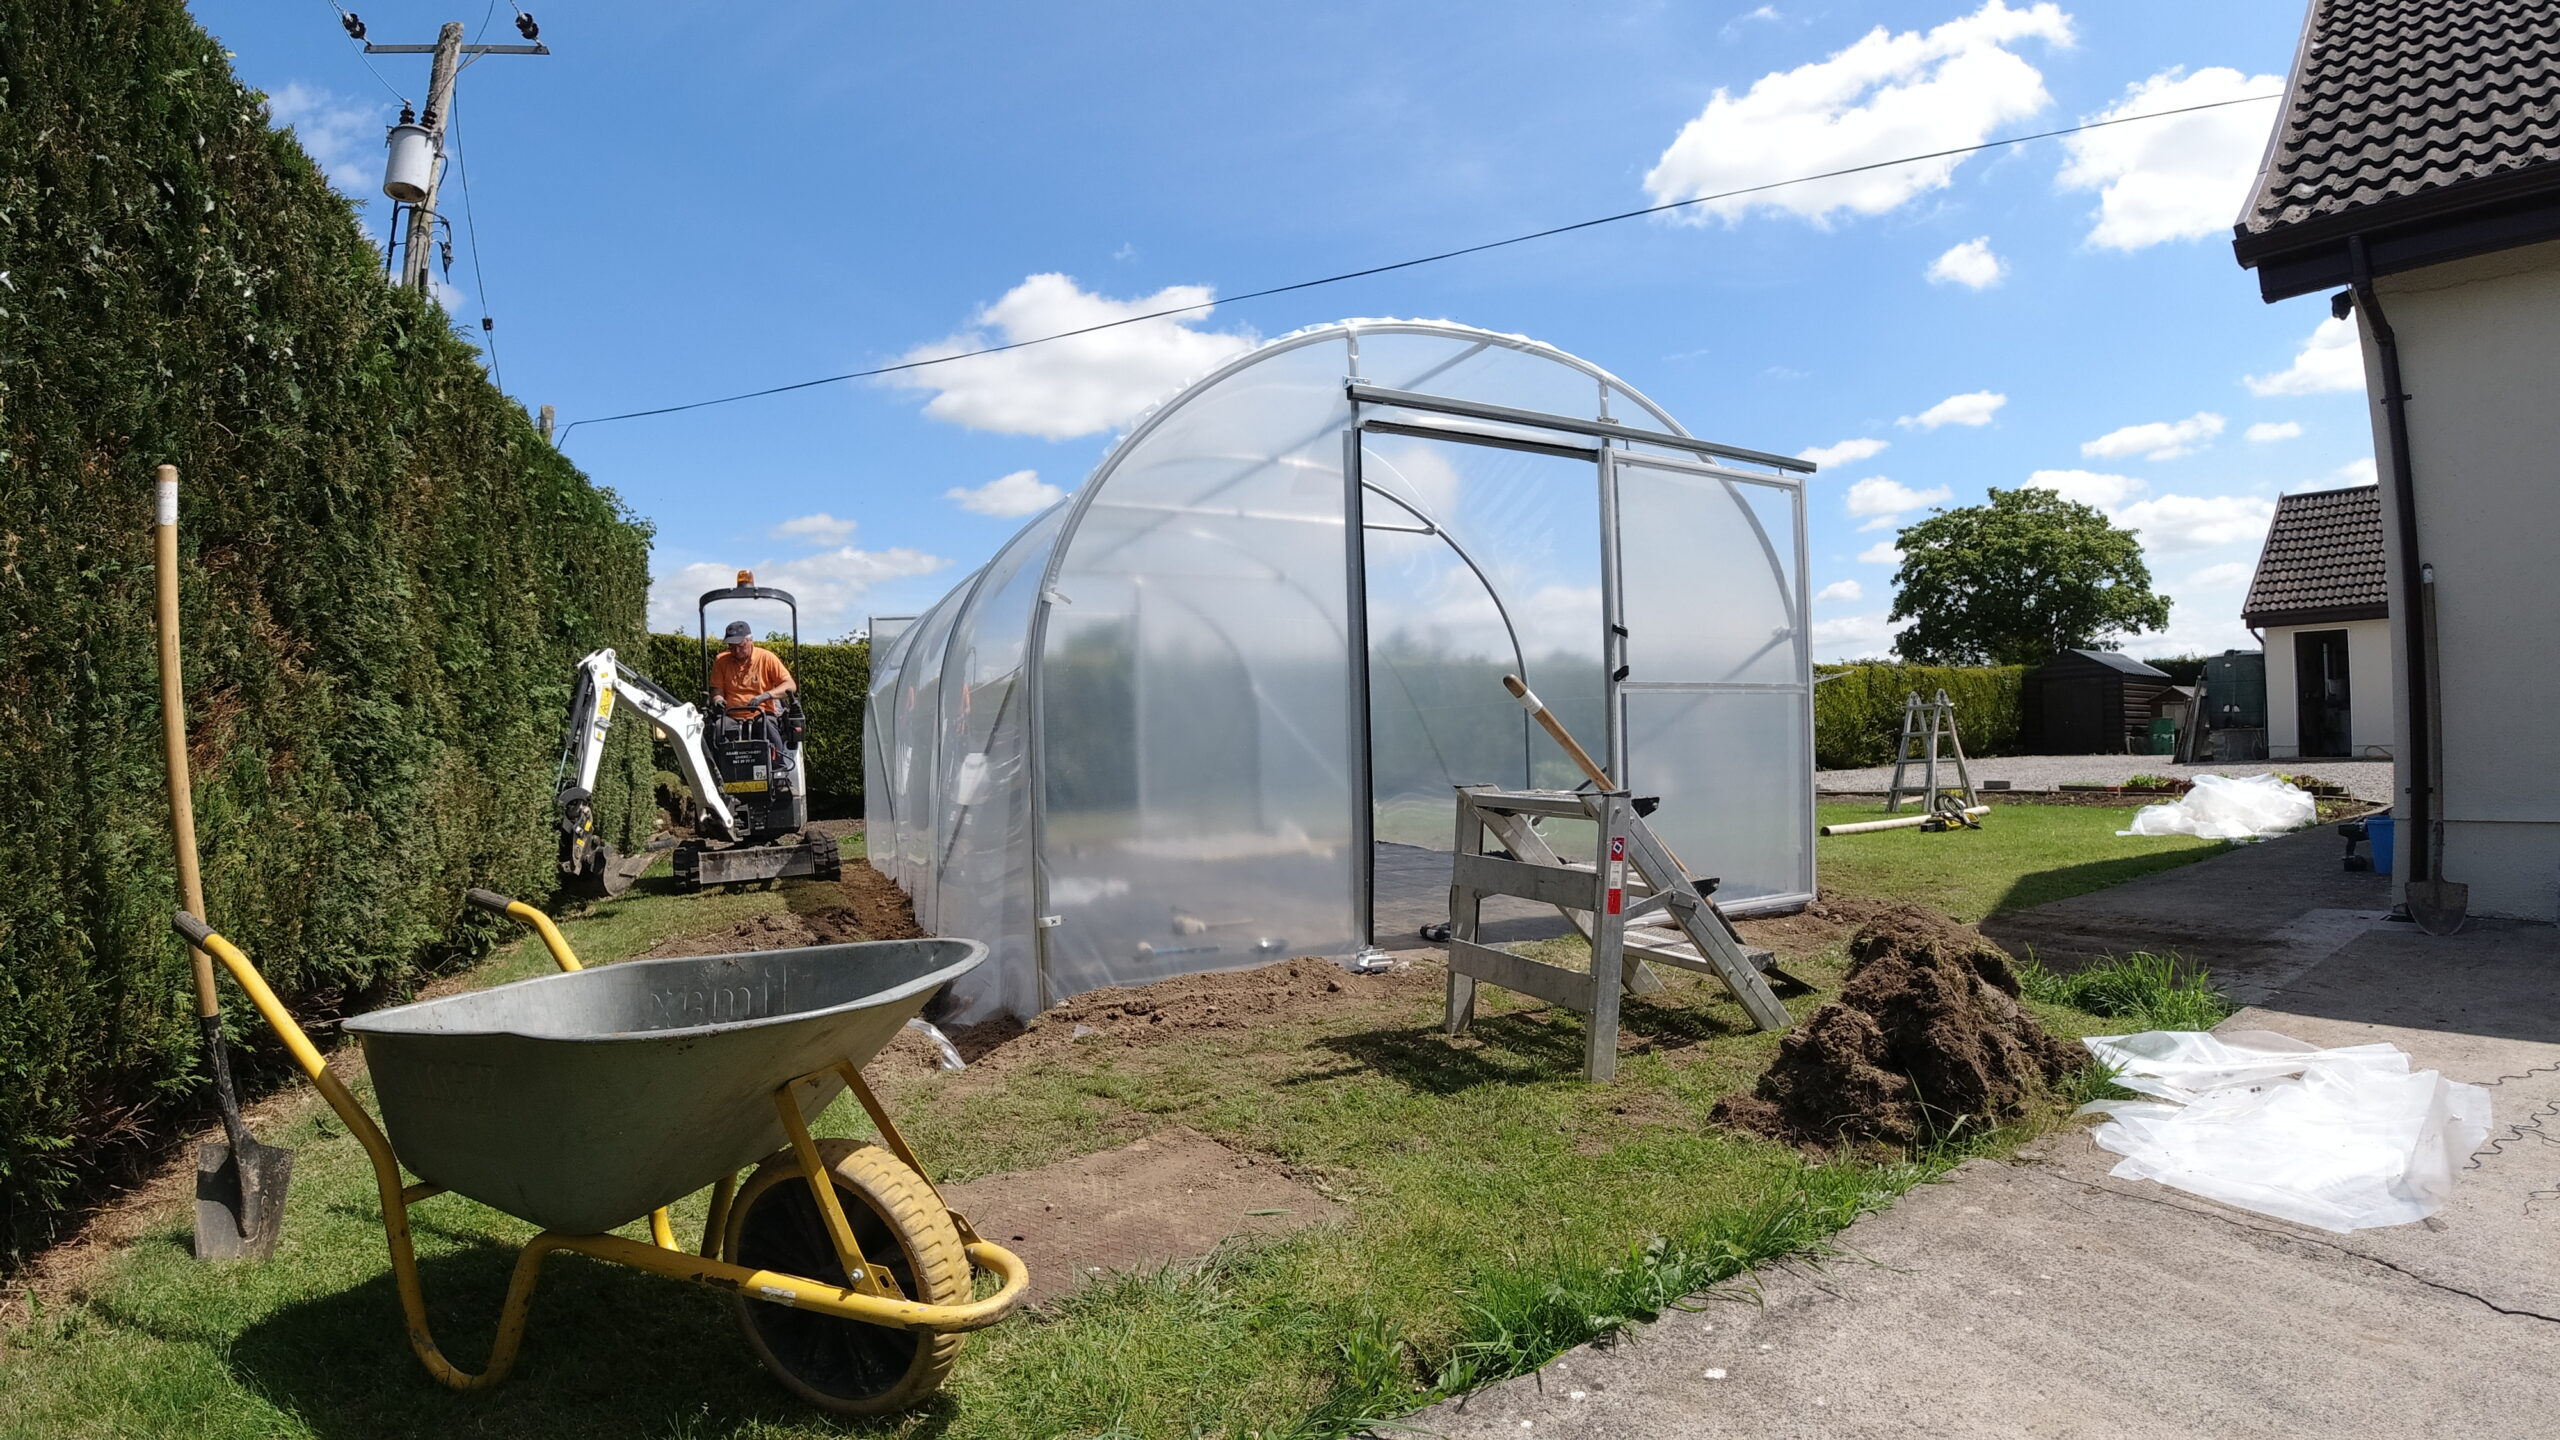
Method of securing the cover
If you have soil that does not have a lot of stone one option is to dig a trench around the frame and bury the cover in the ground. It is the cheapest for materials but does involve labour, however a mini digger with a 30cm wide bucket makes the job a lot less work and a lot more fun. We offer really good aluminium cladding rails as an alternative to burying the cover in the ground. They are simple to use.
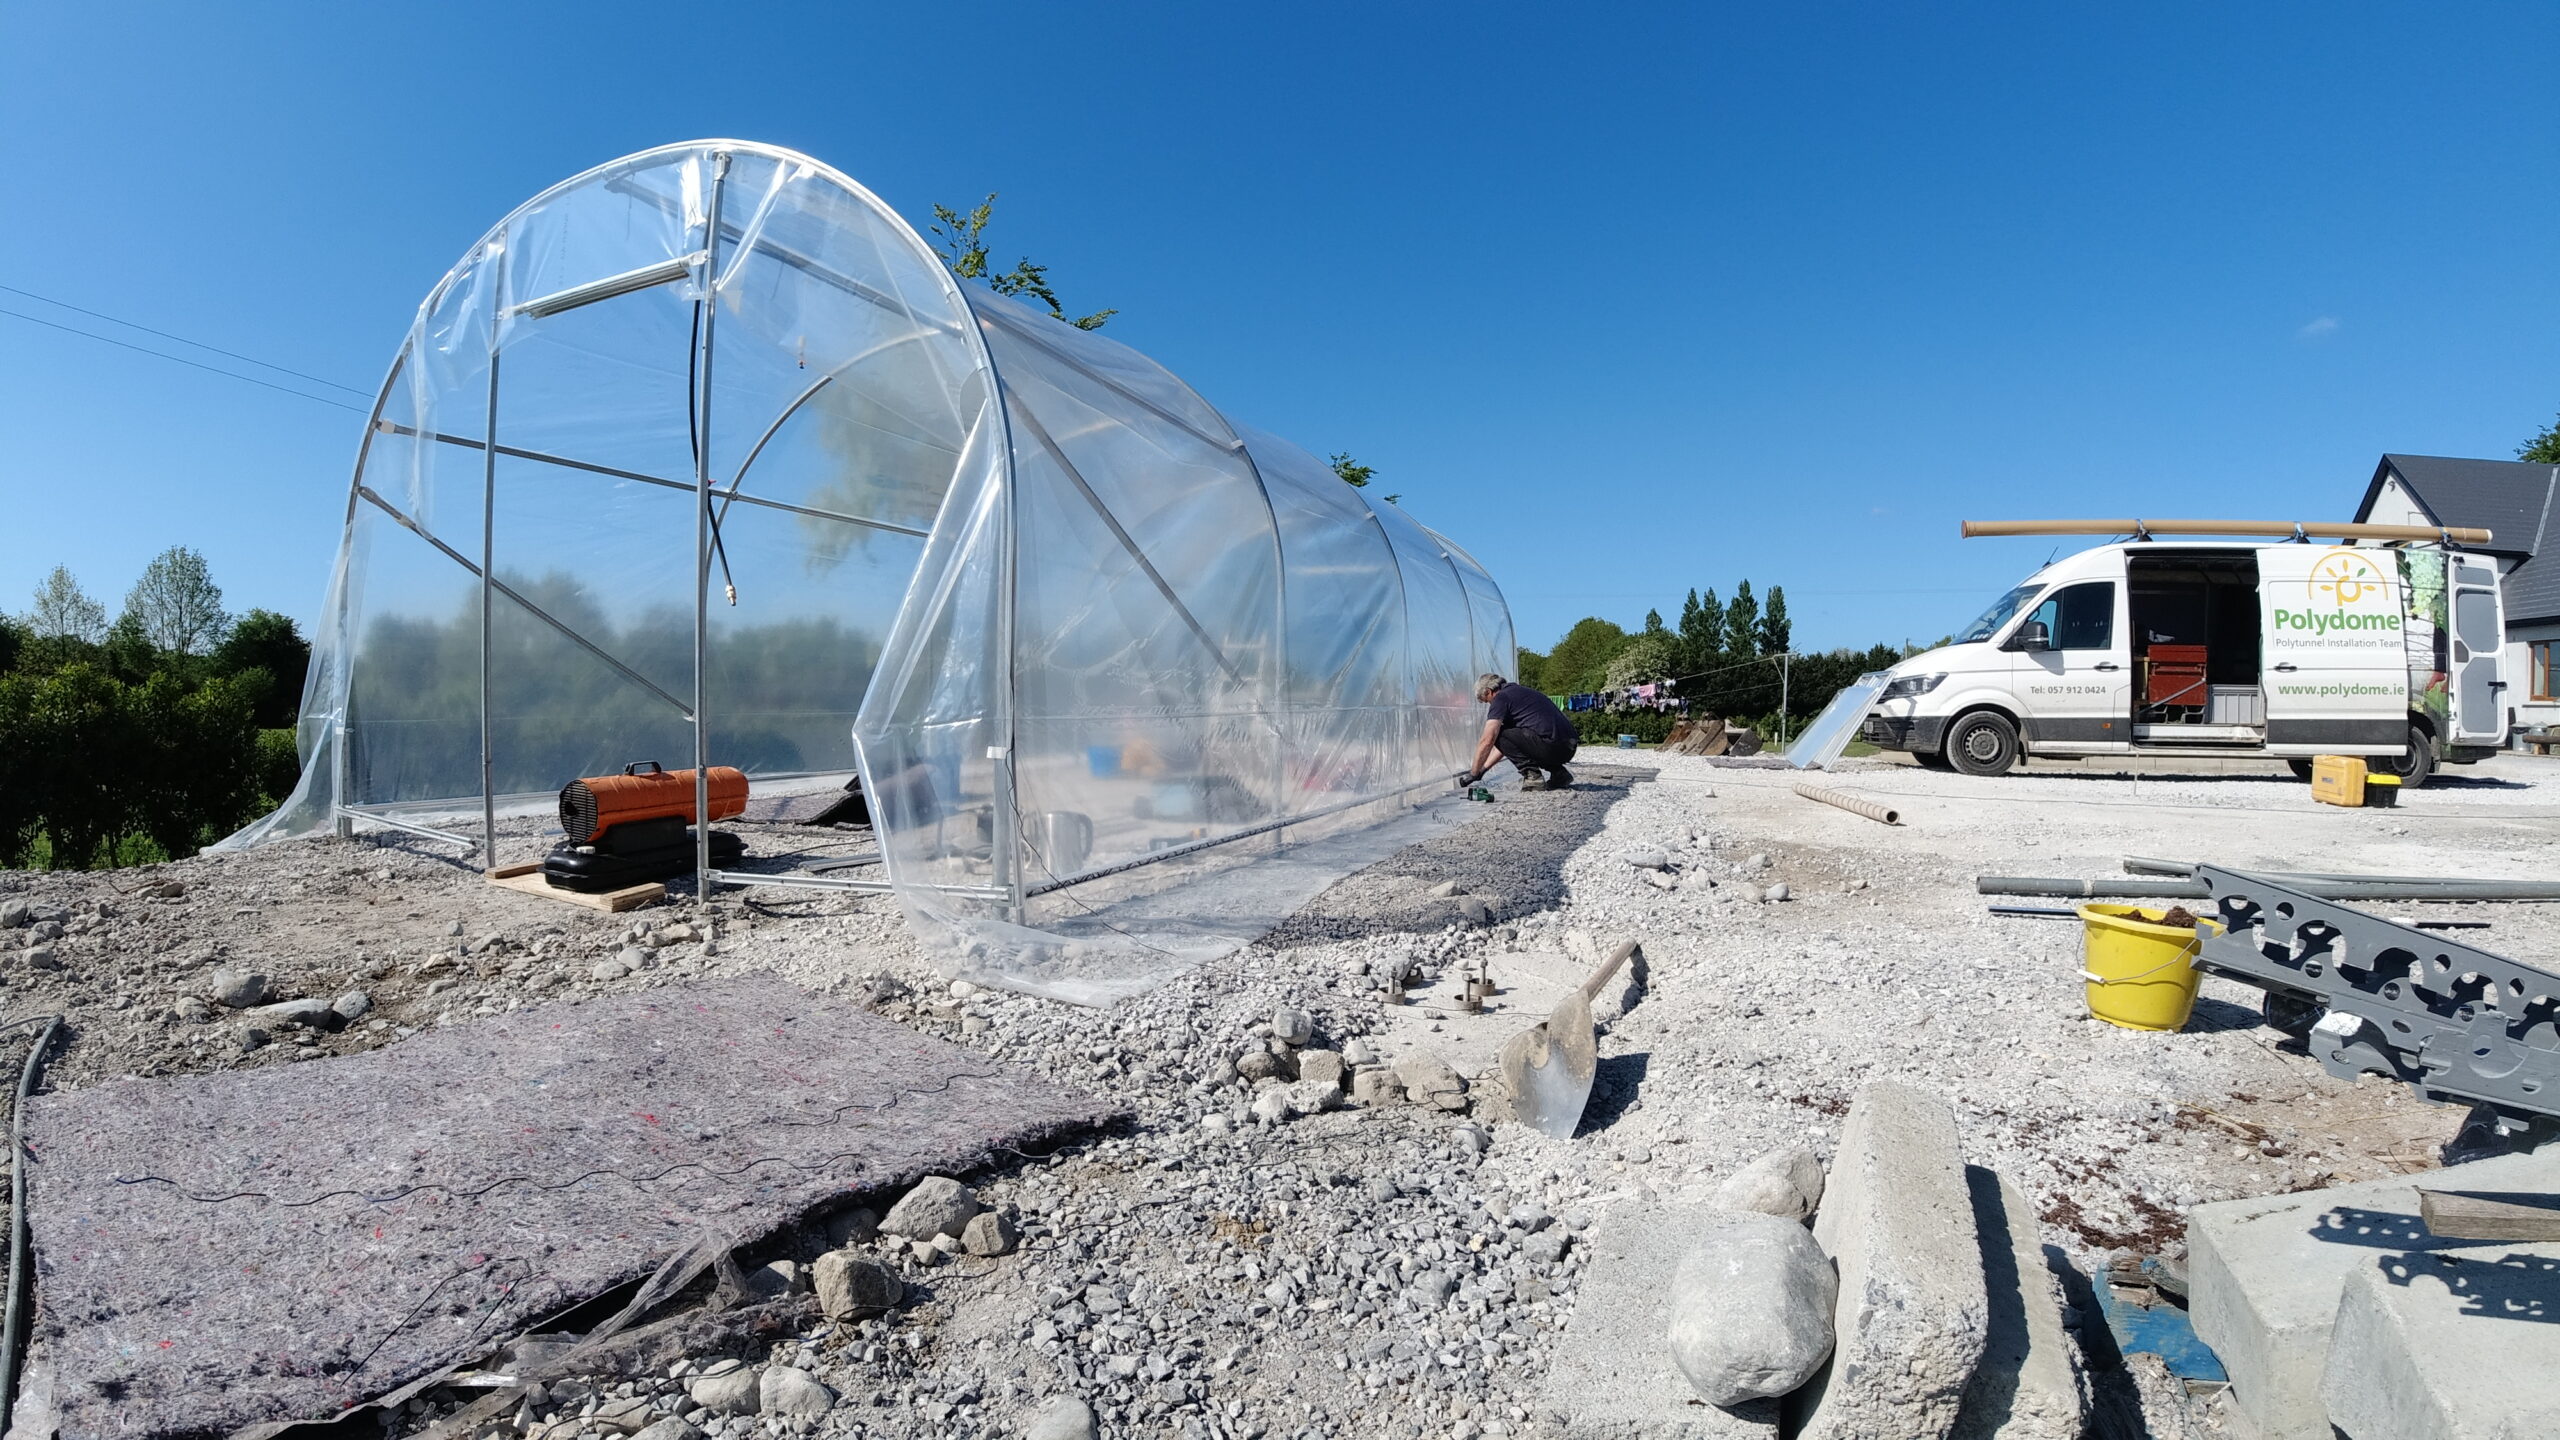
Covering
This is the part that people worry most about but in fact is straight forward. Most important is choosing a day that is calm, dry and preferably with a bit of warmth, 18 degrees C is the optimum temperature. We use a heater inside the Polytunnel to provide warmth if the weather is too cold.
The process of covering involves pulling the polythene onto the frame (which can be done in various ways that we explain in instructions and videos) and opening out the cover over the frame.
The cover is fixed in two points at opposite ends of the Polytunnel (with the cover pulled tight between them. Then the rest of the cover is a step by step process of taking out the slack and securing the cover before tensioning it along the sides and later on the ends. All of this is quite systematic, we will tell you where you pull in what order to get the best looking result.
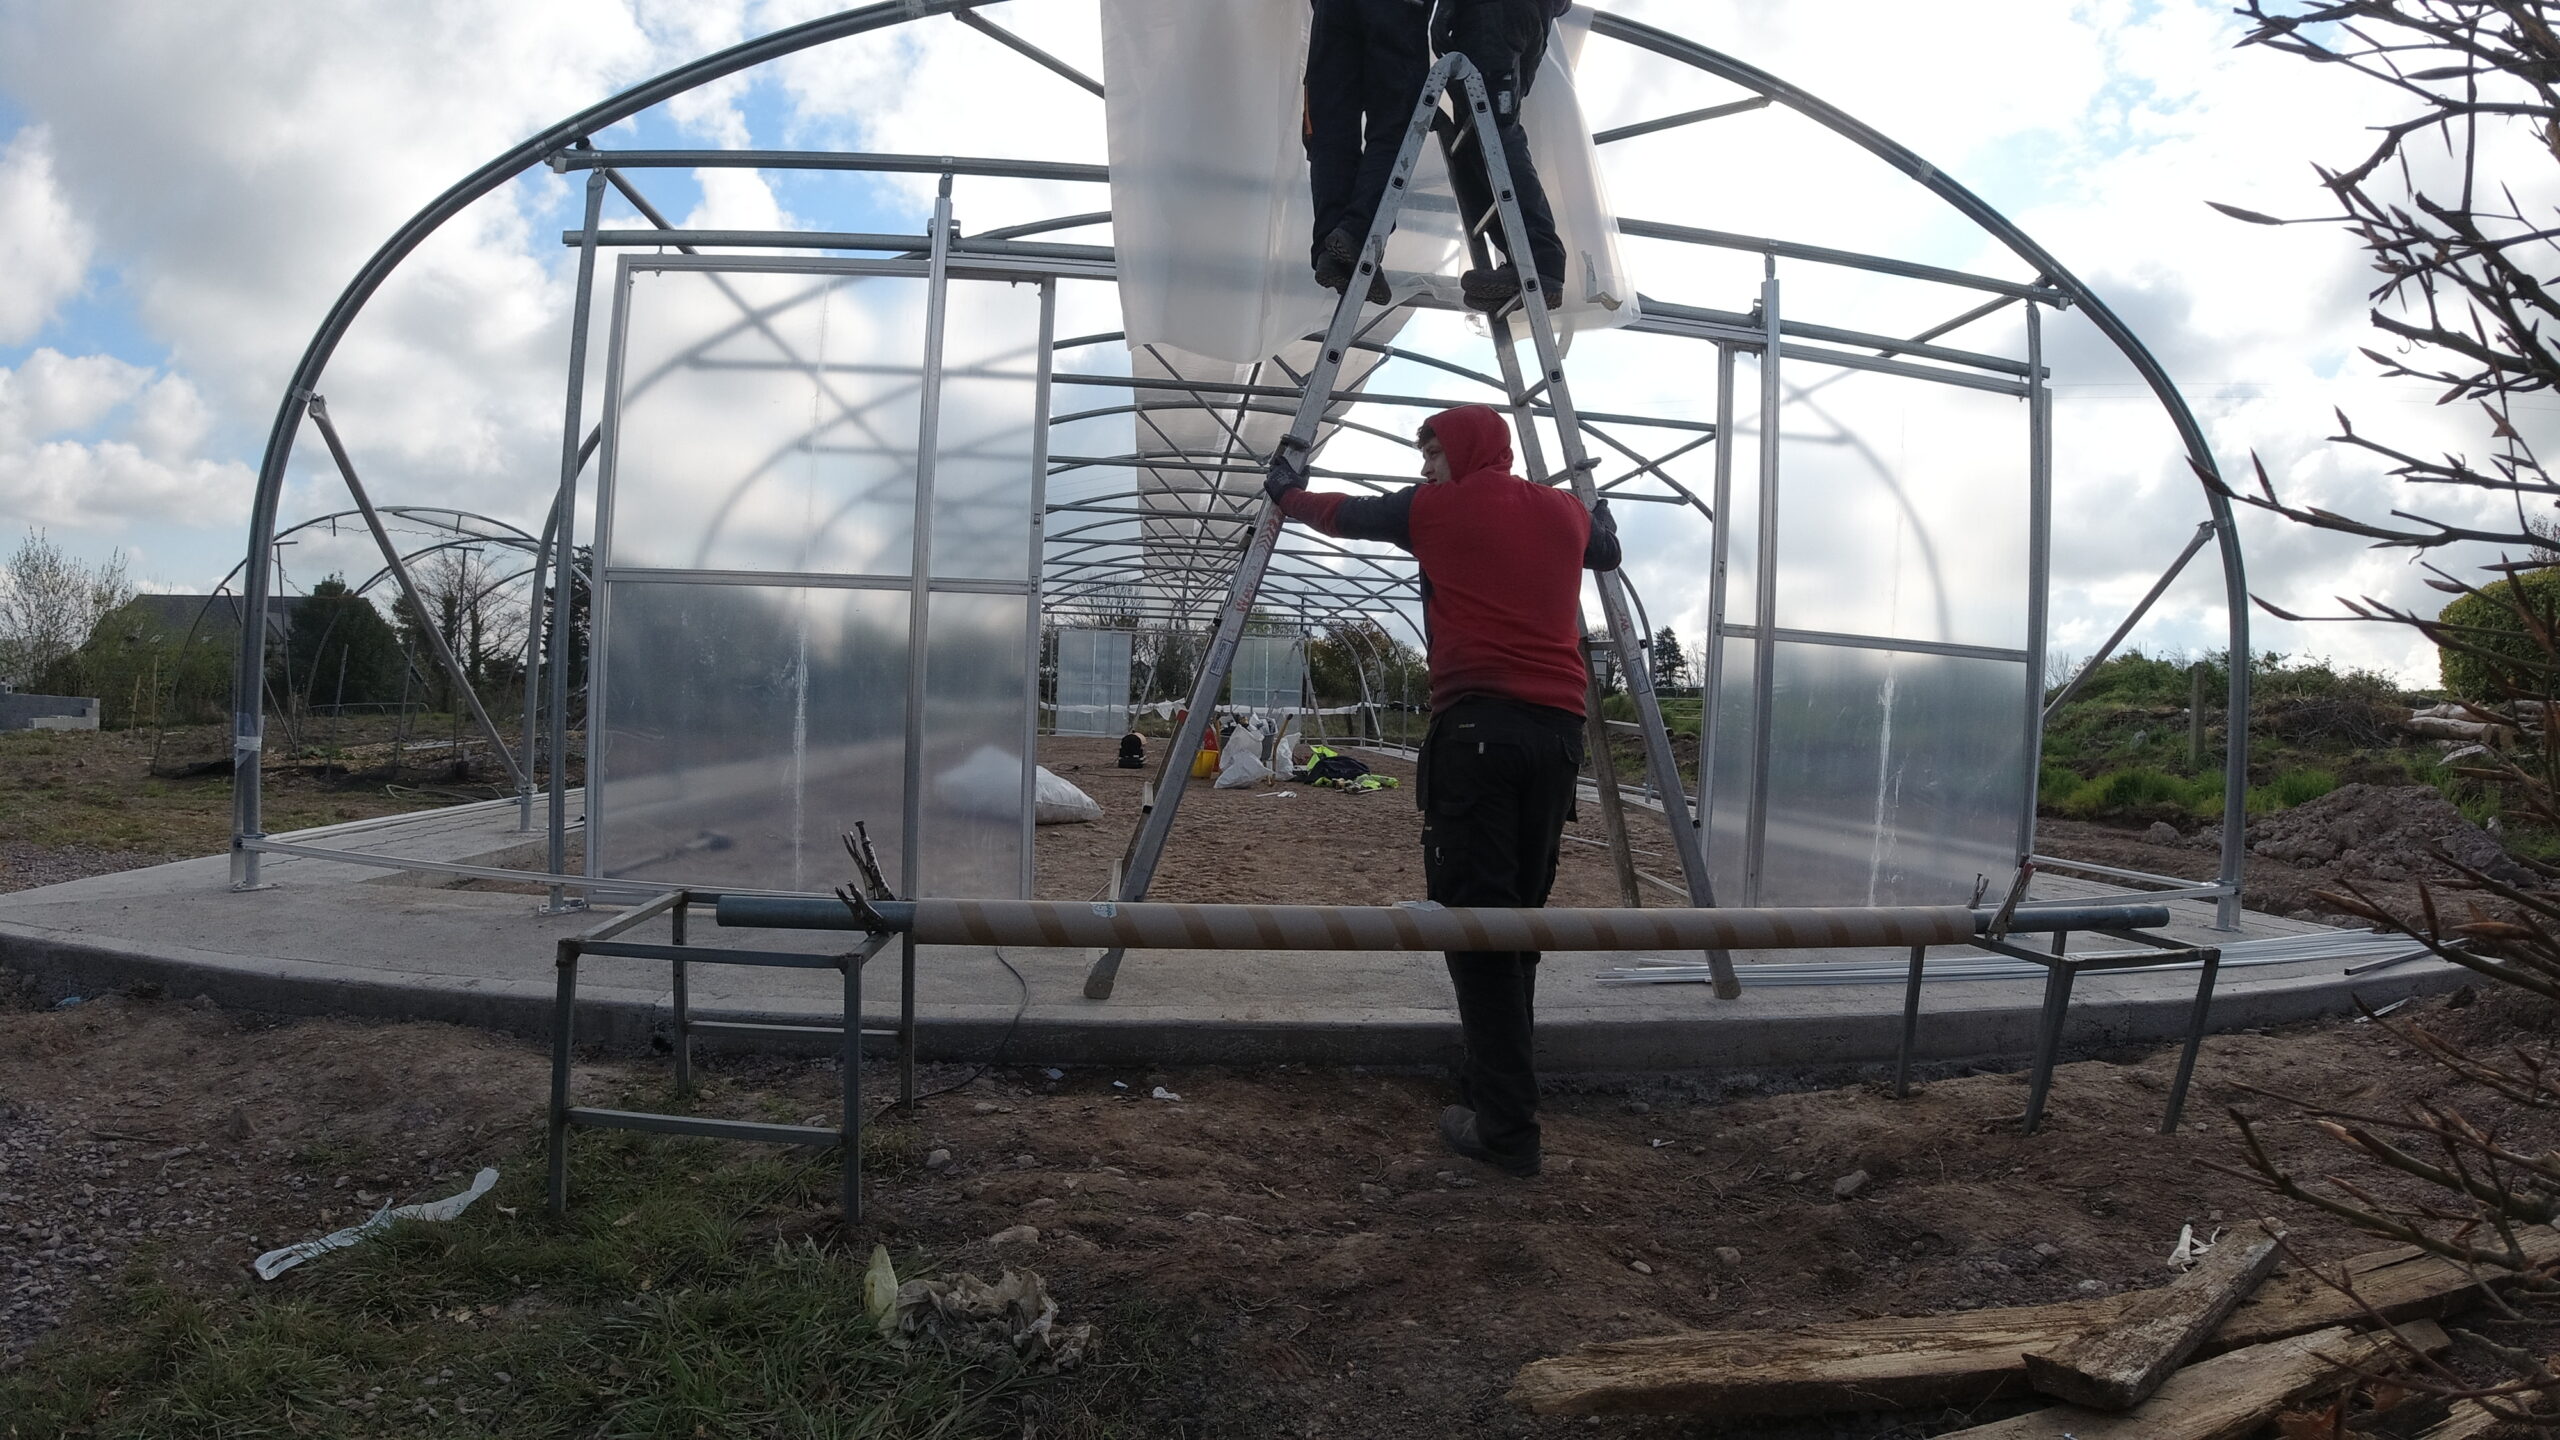
Fitting doors and accessories
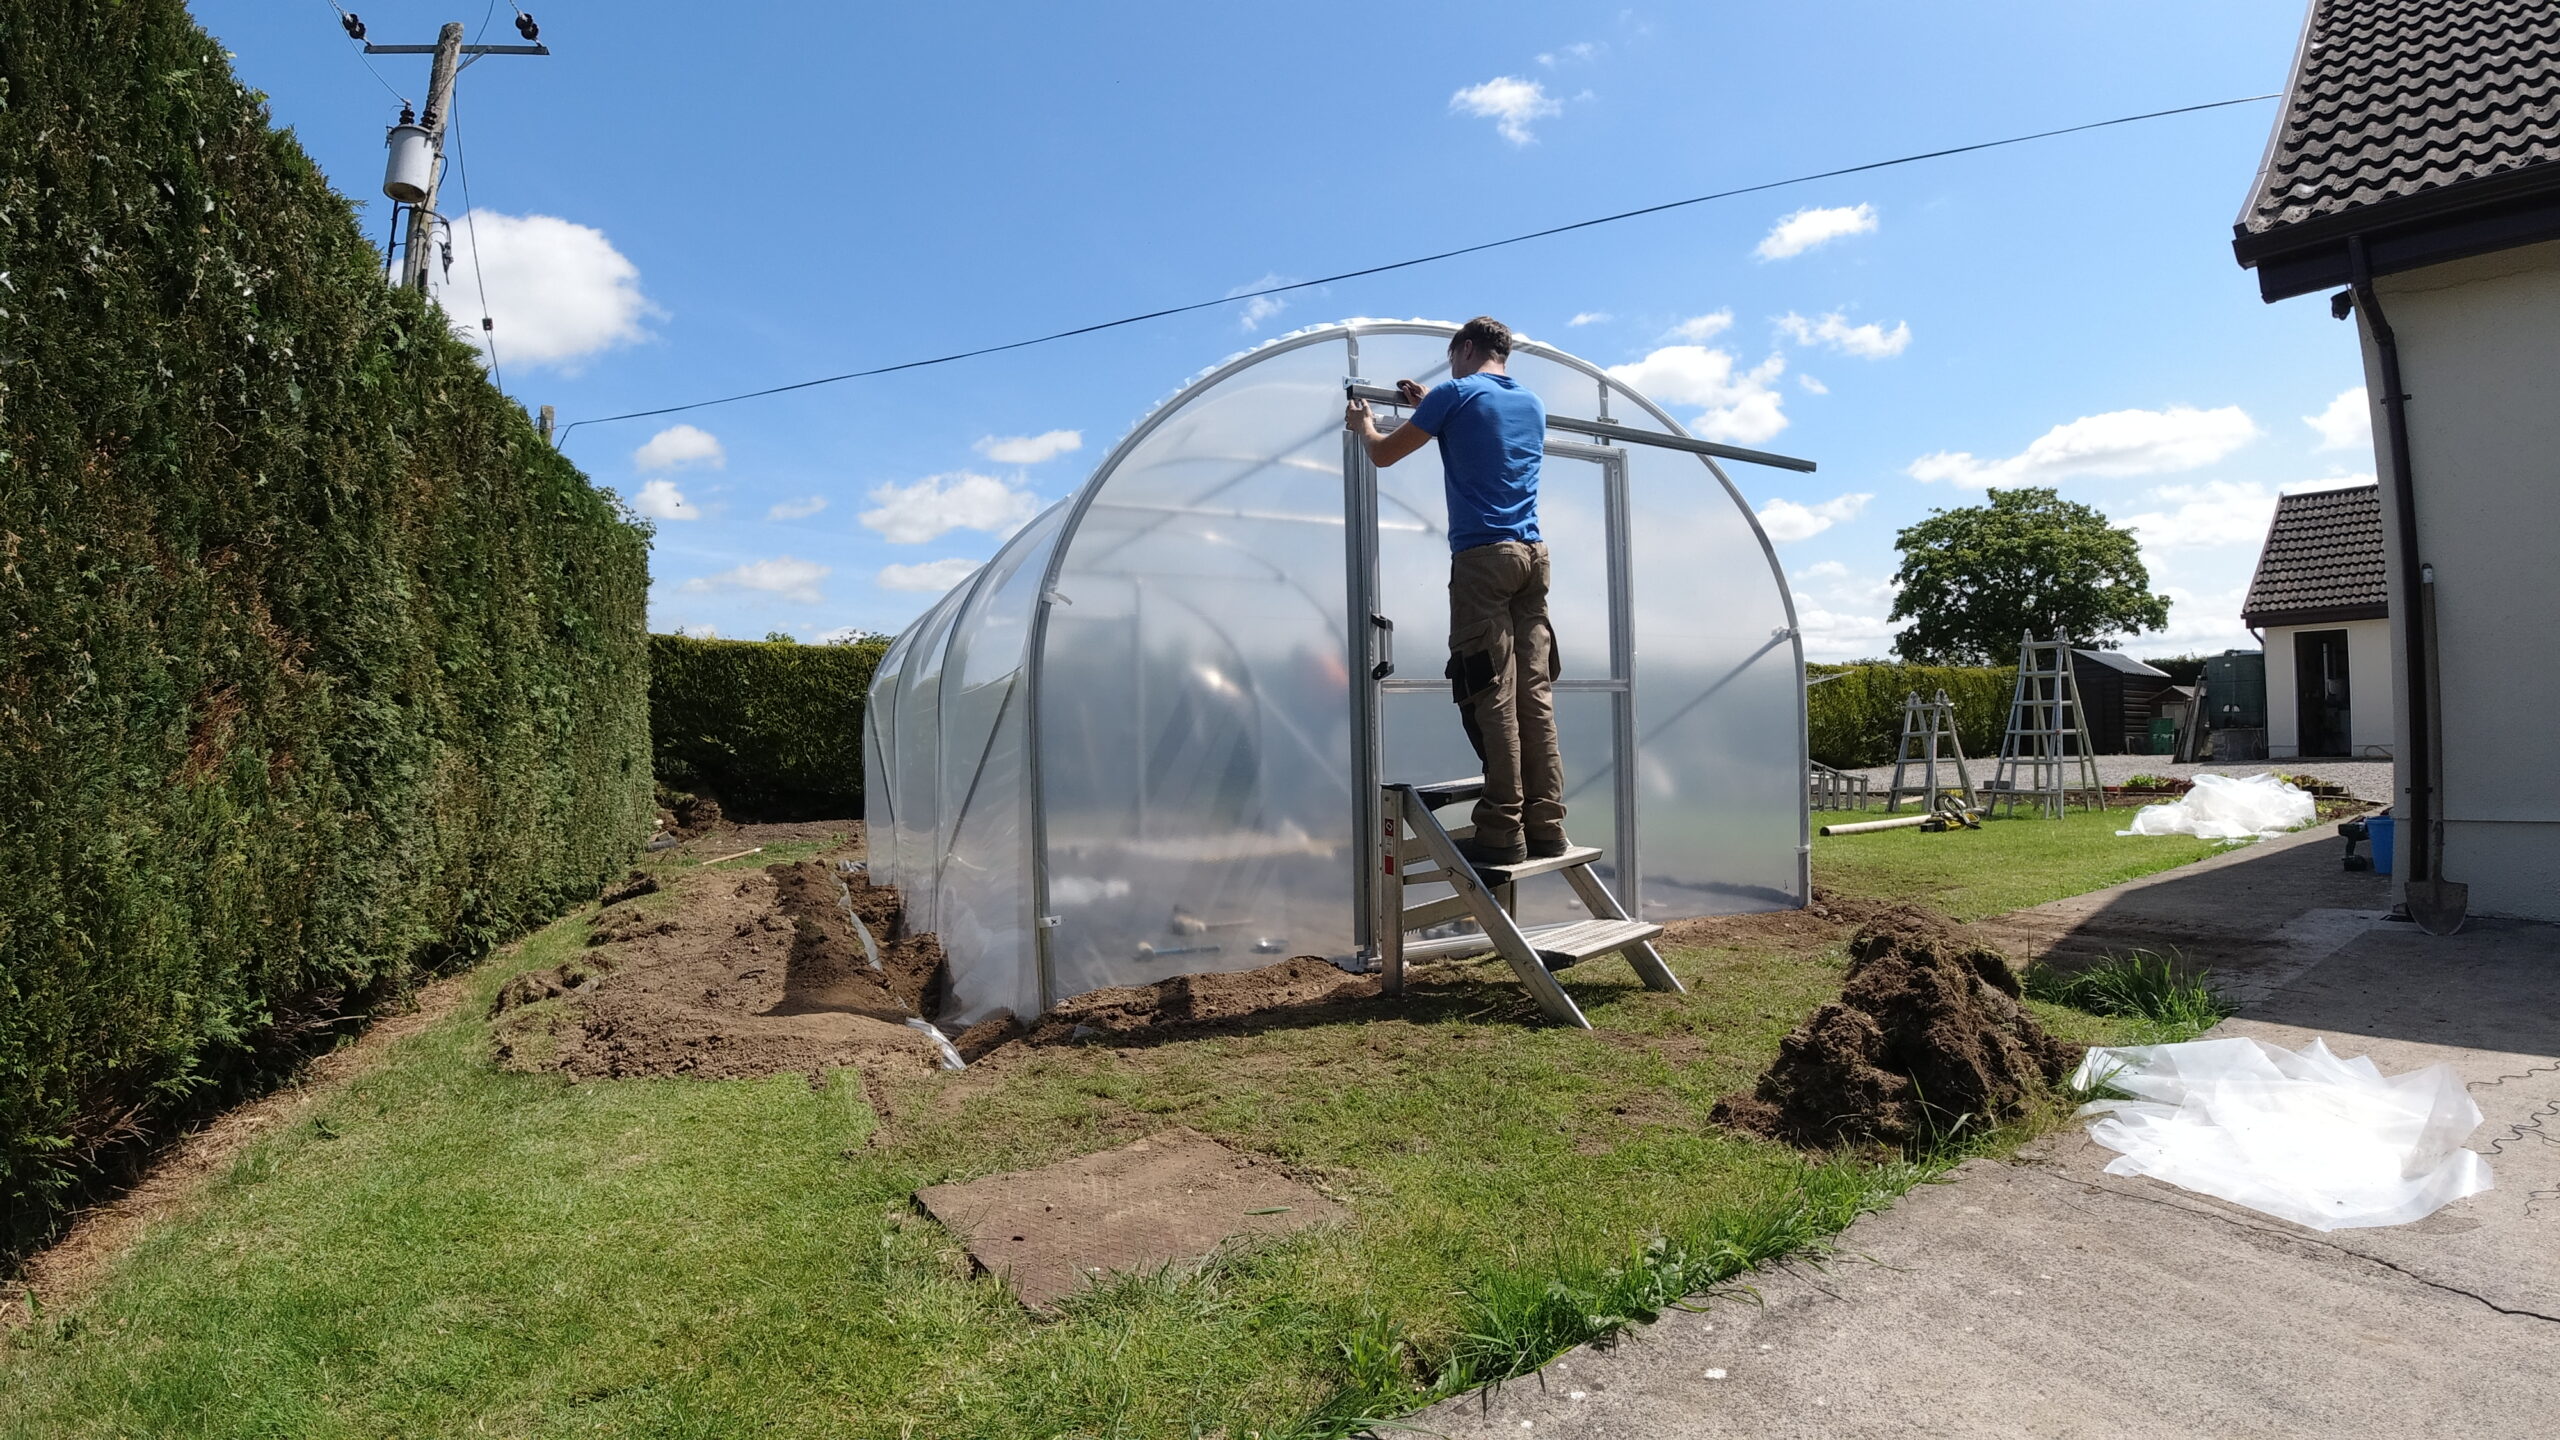
During the frame build part you do a ‘first fix’ of the doors and then after covering you finish them off. Some other size sockets and spanners may be needed such as 19mm spanners and a flat head screwdriver.
To summarise
Building a Polytunnel is not rocket science, but does involve a bit of time and effort. It is not as simple as building an Ikea flat pack and will involve cutting and drilling, but you do not have to be a skilled tradesman to build one.
Building it yourself will save money and there are instructions, videos and a helpline available (and we are only too pleased to help). Our philosophy is if our instructions are not clear enough to you it is our job to help you (and make them clearer in the future).
The Polydome Construction Service

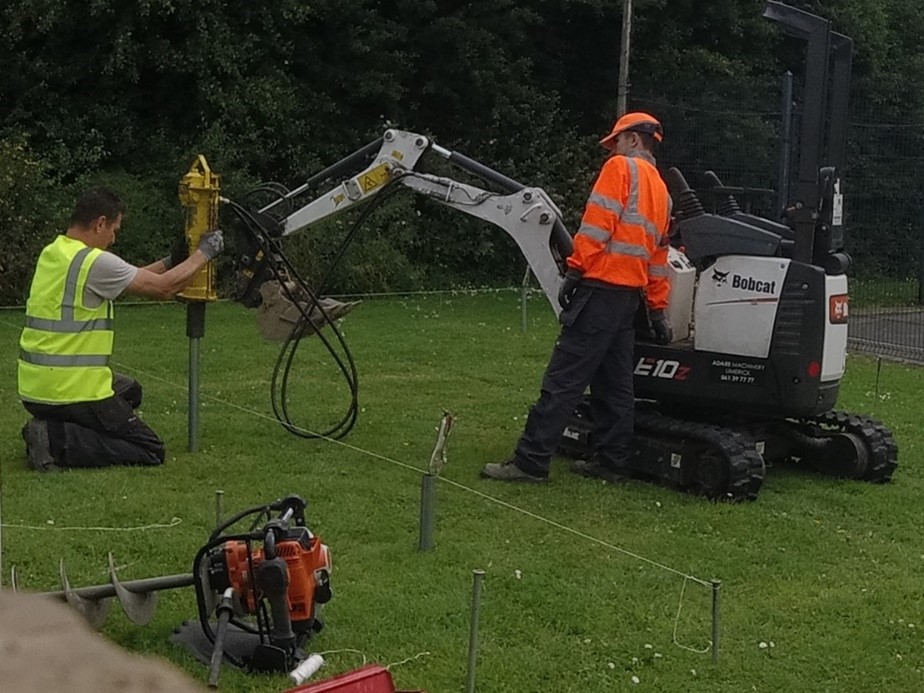
We do offer a construction service with experienced staff and have a wide range of equipment available including a mini digger that we bring to site (people sometimes worry about a digger accessing their property but this one will fit through a doorway that is 750mm wide).
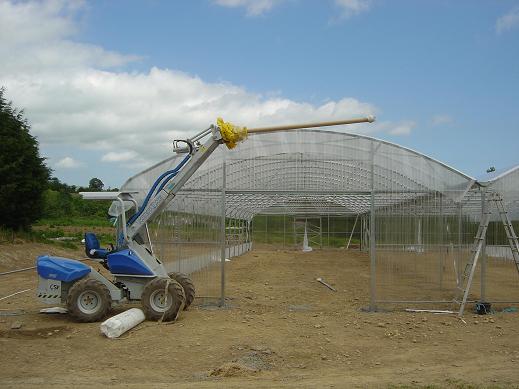
For large Polytunnel structures we can also bring a multifunctional telescopic mini loader with attachments that help reduce manual handling on site (for example lifting the roll of polythene up to the ridge bar to make it easier to pull on).
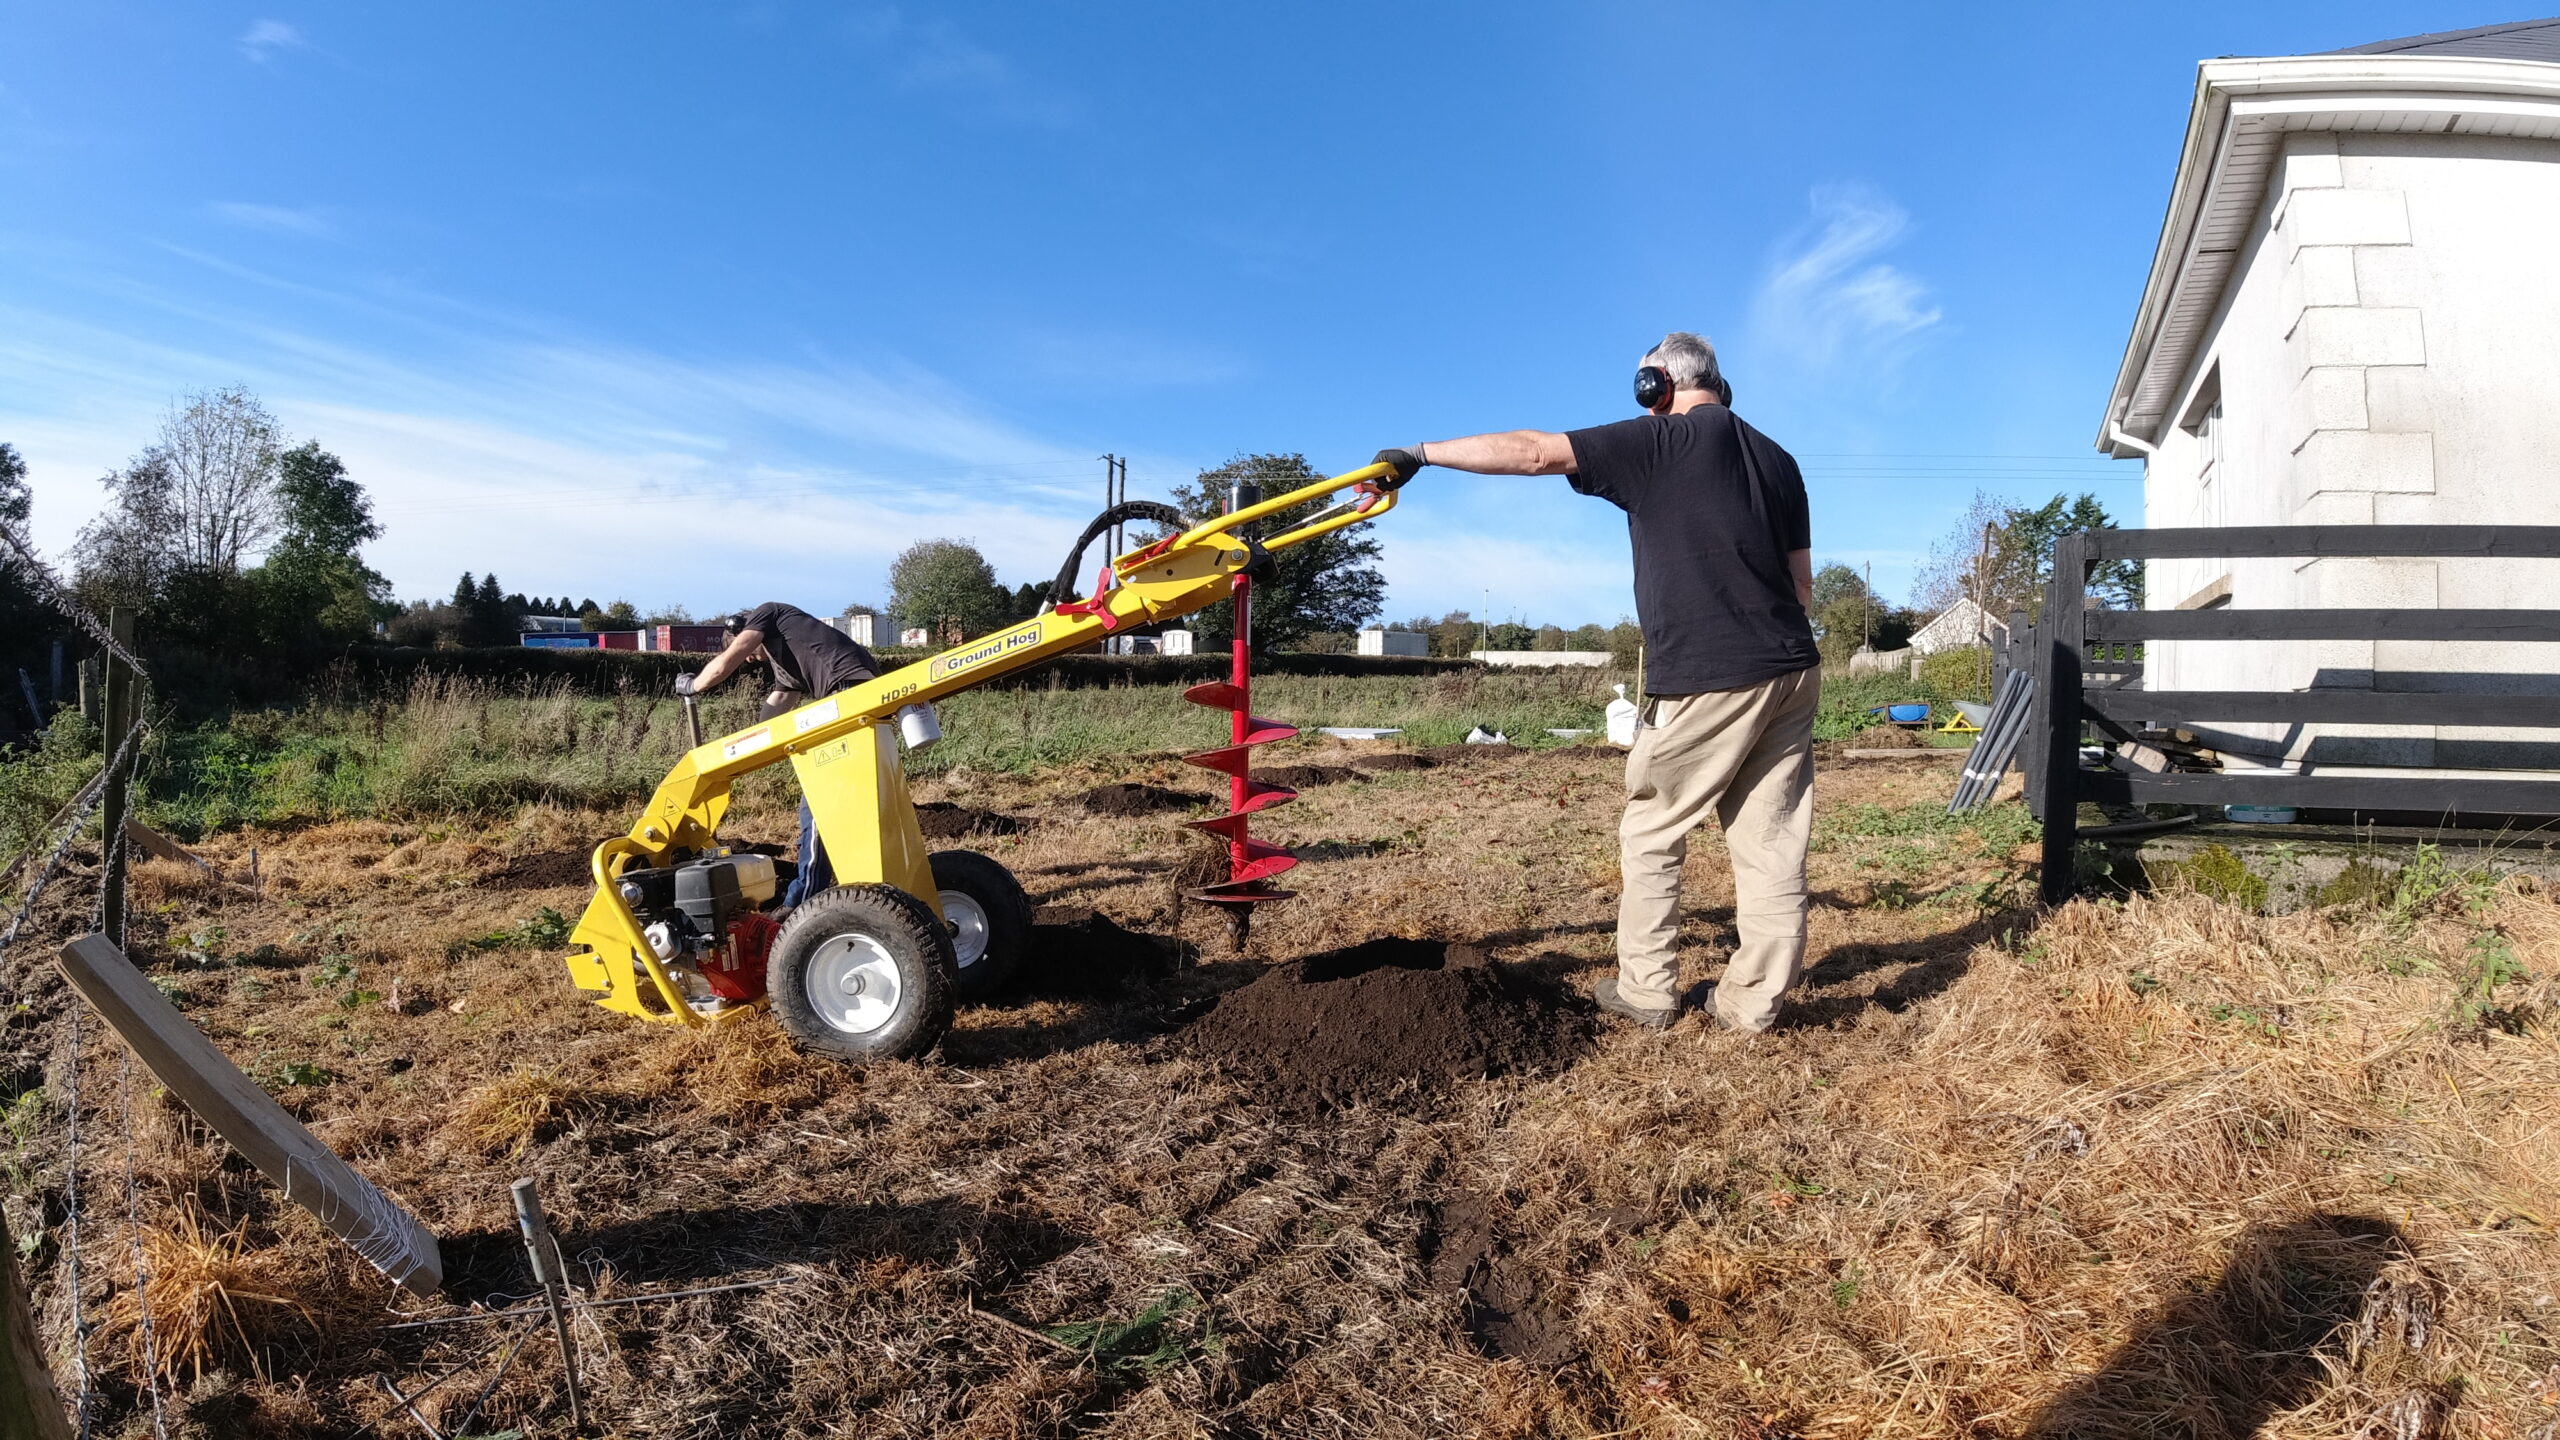
We have an hydraulic earth drill (an auger) which on normal soil will drill nice small holes which save money on concrete.
Once we know the detail of what you would like to order, the site Eircode, information about the ground type and access to the site we can give a price subject to certain criteria being in place.